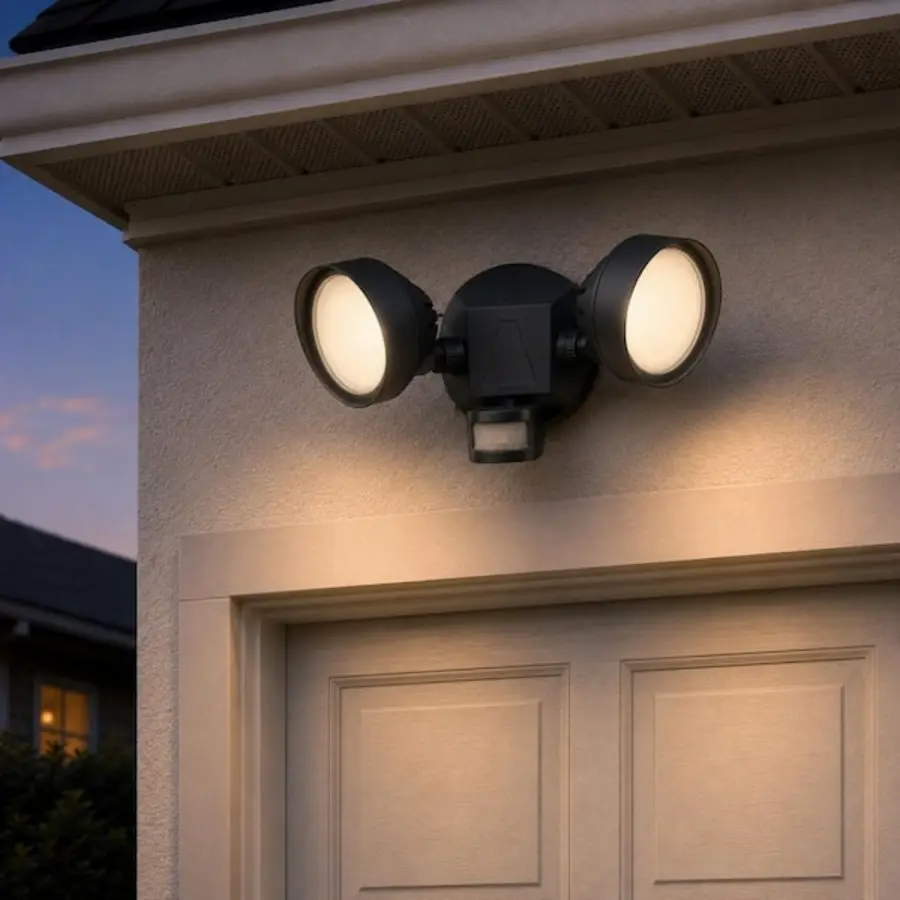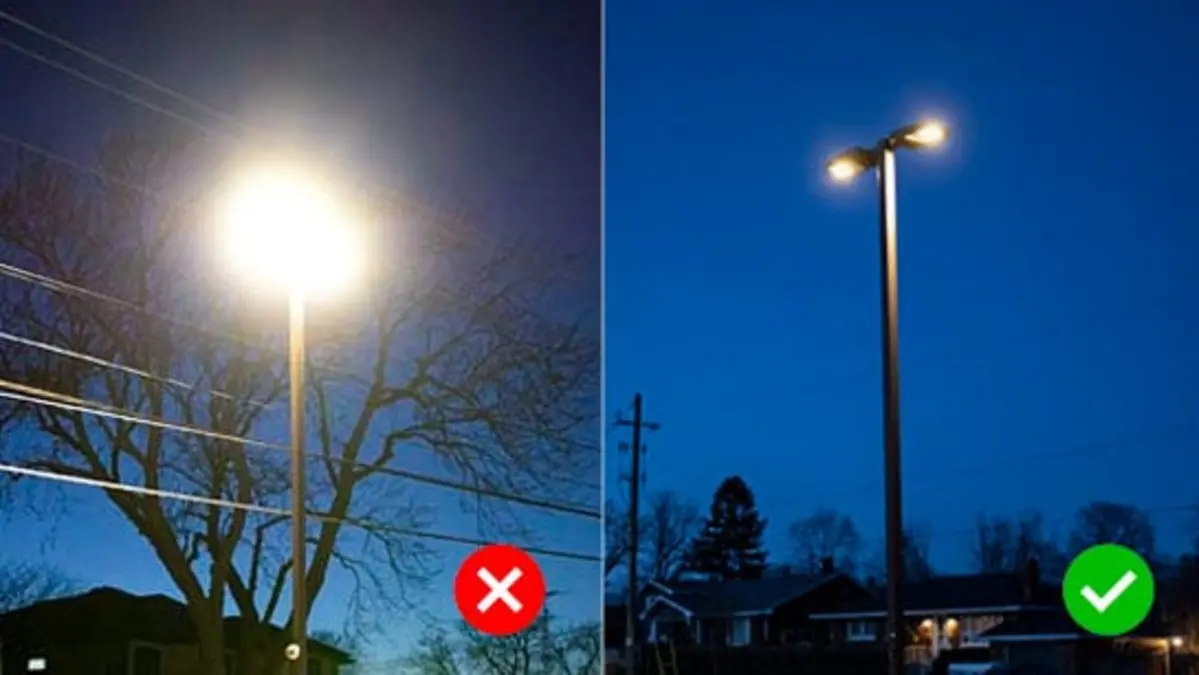
Direct glare is usually best solved by changing the floodlight’s aim and position before adding a shield. Tilt the fixture down toward the actual area you need to see, keep the bright LED face out of normal sightlines, and test the result from the driveway, walkway, door, and neighboring property. If light still spills where it should not, add only a manufacturer-approved visor, backlight shield, or cutoff accessory that does not cover the lens, trap heat, or block the motion sensor.
A floodlight can feel painfully bright even when the yard is not well lit. The issue is often not insufficient light but a visible, concentrated source pointed toward a person’s eyes. Reducing that direct view can improve comfort, walking visibility, security-camera images, and relations with neighbors without simply turning the light off.
Start by identifying the glare path
Stand in the places where the light is objectionable after dark. Do this with the light operating in its normal mode, including its motion-triggered bright setting if it has one.
Look for one or more of these patterns:
- Direct glare: You can see the bright LED panel or lamp from a driveway, patio, gate, sidewalk, or window.
- Light trespass: Light crosses the property boundary or enters a neighbor’s window.
- Reflected glare: Wet pavement, a pale garage door, siding, snow, a vehicle, or a glossy fence throws light back toward your eyes.
- Camera washout: The fixture, or a strong reflection from it, is within a security camera’s view and obscures faces or motion in darker areas.
- Overlighting: The fixture is set brighter than the task requires, making the source hard to look at and creating deep shadows beyond the bright patch.
This diagnosis matters because a side shield may help with spill toward a neighbor but do little for a fixture that is simply aimed too high. Likewise, lowering output may reduce discomfort but leave the source visible at eye level.
1. Aim the floodlight at the task area, not into open space
The first adjustment is usually the most effective: lower the fixture’s tilt in small increments. The beam should land on the driveway, path, entry, gate, or yard zone that needs illumination—not project broadly across the property or toward approaching people.
For a typical wall-mounted security light, start by aiming the heads downward and slightly outward. Avoid aiming a head near horizontal just to reach farther. A low-angle beam puts the luminous face directly in the line of sight of pedestrians, drivers, and neighbors, while also sending more light beyond the intended area.
Make adjustments a little at a time, then check after dark. A useful beam has a reasonably even pool of light over the needed area, without a blinding hotspot near the fixture and a sudden black edge farther away. Guidance on floodlight aiming commonly emphasizes modest downward tilt and avoiding direct line-of-sight placement; this also helps limit light trespass. <a href="https://ningled.com/en/blogs/news/how-to-aim-flood-lights-correctly-reduce-hotspots-and-dark-zones">Ningled’s aiming guide</a> illustrates the relationship between tilt, glare, hotspots, and dark zones.
Check from the approach direction
Do not assess the aim only while standing under the fixture. Walk or drive toward the house from the street, stand at the front door, and look back from the far end of the driveway. If the light is for a side yard, check from the gate, patio, and any common route through that space.
If the LED face is visible from a normal approach, lower or rotate that light head until the source is concealed by the fixture housing as much as possible. You may need to accept a shorter throw and illuminate the far end with a separate, lower-output fixture rather than forcing one floodlight to cover everything.
2. Reconsider mounting position before adding more output
Mounting height and location determine whether a fixture can light a space from above rather than across it. A light mounted higher can often be aimed more steeply downward, which reduces the chance of direct glare. But height is not a universal cure: a poorly aimed fixture can still shine horizontally from a high location.
If relocating the light is practical, prioritize a position that lets you:
- Aim down onto the target surface.
- Keep the fixture out of a person’s ordinary view when entering or leaving.
- Place the brightest part of the beam away from windows, public sidewalks, and property edges.
- Avoid pointing directly at security cameras or reflective surfaces.
Do not move, extend, or rewire a hardwired fixture casually. Outdoor electrical work needs weather-appropriate parts and installation methods, and local requirements vary. If moving the mounting box or changing wiring is necessary, use a qualified electrician and verify current local requirements.
3. Add a compatible shield or cutoff accessory
When aiming alone cannot control the unwanted spill, a purpose-made shield can block light in a specific direction while preserving the useful part of the beam. Depending on the fixture, this may be called a visor, glare shield, backlight shield, side shield, or cutoff accessory.
Choose an accessory designed for the exact fixture model whenever possible. A proper shield should attach as intended by the manufacturer and leave required ventilation, drainage, electrical clearances, and sensor sightlines intact.
Match the shield to the problem
| Problem | More suitable control | What to check |
|---|---|---|
| Light enters a neighbor’s property behind the fixture | Backlight shield | Confirm the useful forward beam still reaches the target area. |
| The source is harsh when viewed from one side | Side shield or visor | Test from the offending viewing position after dark. |
| Light goes upward toward the sky or upper windows | Cutoff-style fixture or approved visor | Ensure the fixture can still aim down adequately. |
| Broad spill persists in several directions | Replace with a more controlled fixture | Consider optic, beam spread, output, and mounting location together. |
Shields work by blocking unwanted angles, not by making the fixture more efficient in every direction. Expect some reduction in total coverage. That is usually acceptable if the remaining light is placed where it is useful.
A full-cutoff or fully shielded fixture is designed to limit light emitted above the horizontal plane. This can be a better long-term answer than retrofitting a basic floodlight, especially where upward spill or recurring neighbor complaints are the main problem. <a href="https://www.revolveled.com/blogs/shop-talk/prevent-led-area-light-glare">Revolve LED’s overview of residential glare</a> explains why fixture cutoff and downward aiming need to work together.
4. Do not improvise a cover over the fixture
Avoid taping cardboard, foil, fabric, plastic, painted sheet material, or other makeshift pieces over a floodlight. These can obstruct heat dissipation, collect water, degrade outdoors, interfere with the lens, or create an electrical and fire concern. They may also void the fixture warranty.
Do not paint the lens or apply film to it. This often creates uneven output, heat issues, and poor long-term results. Likewise, do not block part of the fixture if the motion sensor sits in that direction; a shield that solves glare but prevents detection is not a useful fix.
If a manufacturer does not offer a compatible accessory, replacement with a better-controlled fixture is generally safer and more predictable than modifying the existing one.
5. Preserve motion-sensor coverage while changing the aim
A motion sensor and a floodlight head may aim independently, or they may move together. Before tightening anything, note the sensor’s original direction and test zone.
After each lighting adjustment, walk through the approach routes you want covered. Test from several directions, including the route a visitor, delivery driver, or vehicle would take. Then check whether the light triggers too readily from a sidewalk, street, moving branches, or a neighbor’s activity.
If a shield changes the sensor’s field of view, reposition the sensor if the fixture allows it. If it does not, choose a different glare-control approach. For more general setup and troubleshooting, see our guide to <a href="/guides/hardwired-motion-sensor-flood-lights/">hardwired motion-sensor floodlights</a>.
6. Reduce output or duration only after controlling the beam
Dimming, selecting a lower-output setting, or shortening the on-time can improve comfort, but these are secondary adjustments. First direct the light properly. A lower-output floodlight aimed into someone’s eyes can still be objectionable, while a properly shielded and aimed light may provide better usable visibility at a lower setting.
If your fixture has adjustable heads, it can be more effective to use two gently aimed heads than one head pointed far outward. If the area remains patchy, add light closer to the dark task area rather than increasing the brightness of a distant fixture.
Final after-dark checklist
Before considering the job finished, confirm that:
- The fixture’s bright face is not visible from normal walking and driving approaches.
- The beam lands on the intended ground-level area.
- No direct light reaches nearby windows or crosses the property line unnecessarily.
- Motion detection still works on the approaches that matter.
- Security camera footage remains readable without a bright flare or washed-out foreground.
- The fixture is dry, secure, and fitted only with approved components.
The goal is not to make an outdoor security light as bright as possible. It is to put enough light on the relevant area while keeping the source itself out of people’s eyes. Correct aiming, a sensible mounting position, and a compatible shield usually achieve that more effectively than adding wattage or improvised covers.
References
- How to Aim Flood Lights Correctly (Reduce Hotspots and Dark Zones) – Ningled. (n.d.). https://ningled.com/en/blogs/news/how-to-aim-flood-lights-correctly-reduce-hotspots-and-dark-zones
- How to Reduce Glare and Light Pollution in Outdoor Security Lights – ALUSSO LIGHTING. (n.d.). https://www.alussolighting.com/blogs/blog/how-to-reduce-glare-and-light-pollution-in-outdoor-security-lights
- How Can I Install Floodlights To Avoid Light Trespass? - Knowledge - NSZ. (n.d.). https://www.nszlamp.com/info/how-can-i-install-floodlights-to-avoid-light-t-103505790.html
- Aim a Motion-Sensor Floodlight to Stop Camera Washout. (n.d.). https://hi-hyperlite.com/blogs/comprehensive-guides/aim-outdoor-floodlight-prevent-camera-washout
- Glare Control for LED Flood Lights in Outdoor Projects. (n.d.). https://reitalight.com/glare-control-for-led-flood-lights-in-outdoor-projects
- How to Prevent LED Area Light Glare in Residential Neighborhoods. (n.d.). https://revolveled.com/blogs/shop-talk/prevent-led-area-light-glare
- What is a Light Shield and How Does It Improve Lighting?. (n.d.). https://www.accessfixtures.com/how-light-shield-works
- Reducing glare from flood light - Reddit. (n.d.). https://www.reddit.com/r/Lighting/comments/1cev6xw/reducing_glare_from_flood_light