Under-cabinet lighting works best when it is planned with the cabinets, not added after the final trim, backsplash, and paint are complete. Decide where the light should fall, where power and drivers can be concealed, and how the lights will be controlled before cabinets are installed or finished. Those decisions determine whether the result is a clean task-lighting layer or a collection of visible cords, LED dots, and awkward switches.
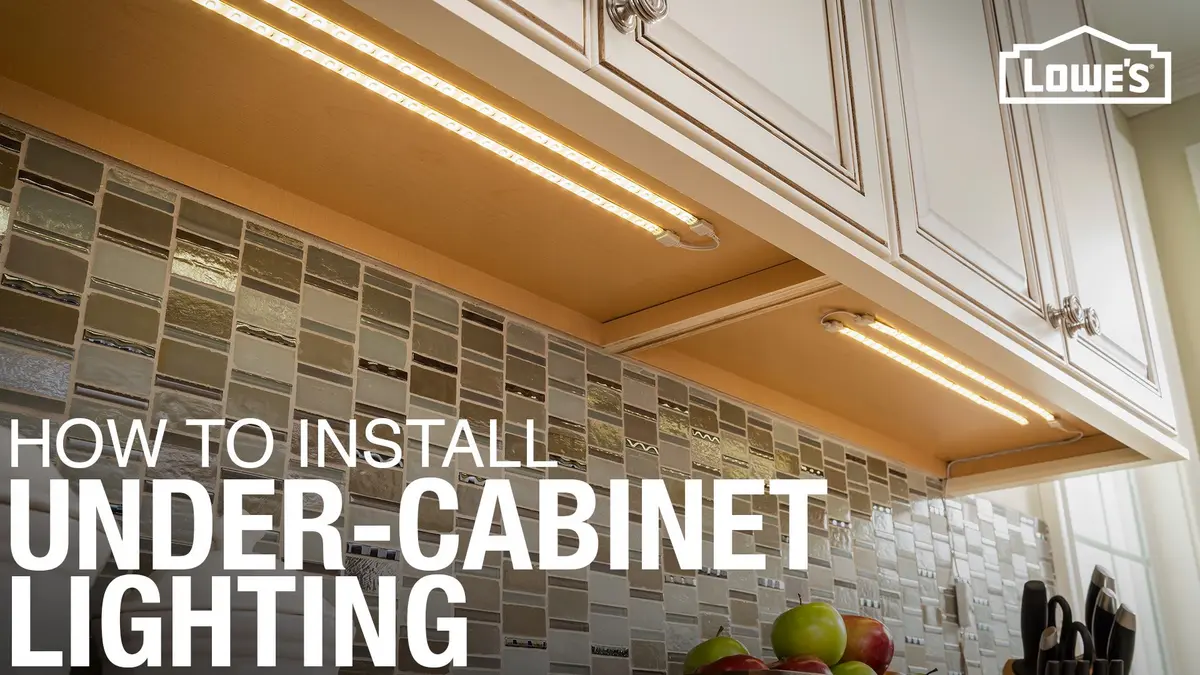
For most kitchens, use continuous linear fixtures or a well-diffused tape-light system placed near the cabinet front edge but hidden behind the lower rail or light valance. This puts useful light on the work surface and reduces shadows from the person standing at the counter. A hardwired under cabinet lighting system should be planned and connected by a qualified electrician, who can confirm the current local requirements and the suitability of the chosen components.
Start with the countertop, not the fixture
The purpose of under-cabinet lighting is to illuminate the worktop. Before choosing a fixture, stand at the main preparation areas and identify where hands, knives, small appliances, and ingredients need clear light. Pay particular attention to:
- The counter between the cooktop and sink
- Food-preparation space beside the refrigerator or pantry
- Dark corners beneath wall cabinets
- Counters interrupted by windows, open shelving, or tall cabinets
- Areas where upper cabinets stop short of the backsplash
Ceiling lighting alone often leaves the counter in shadow because your body blocks the light when you face the work surface. Under-cabinet lighting solves that problem only when it is positioned to project forward across the counter rather than straight down against the wall.
Place the fixture toward the front of the cabinet bottom
Mount the light close to the front of the cabinet underside, usually concealed by the cabinet鈥檚 lower front rail. This is generally the most effective under cabinet light placement because it sends light across the counter, including its front edge where preparation often happens.
Avoid mounting a fixture tight against the backsplash unless the cabinet construction leaves no alternative. A rear-mounted fixture can create a bright strip on the wall while leaving the front of the counter relatively dim. It can also make a glossy backsplash look harsher than intended.
The exact position depends on cabinet depth, the height of any front rail, the fixture鈥檚 beam pattern, and the backsplash finish. Before permanently mounting a system, temporarily hold or tape one sample fixture in place and turn it on after dark. Check for three things:
- Whether the front edge of the countertop receives light
- Whether the light source is visible from normal kitchen sightlines
- Whether the backsplash has distracting glare, scallops, or bright reflections
Treat each cabinet run as a lighting zone
A long, uninterrupted cabinet run usually looks best with continuous light. Breaking it into short isolated bars can create dark seams that are noticeable on pale counters and reflective backsplashes.
Plan separately around obstructions. A range hood, microwave, window, open shelf, and tall pantry can divide one visual run into several practical sections. Each section may need its own fixture length, wire route, or feed point. Do not assume light will travel around these interruptions.
At inside corners, test the overlap between two fixtures. A gap at the corner can leave a conspicuous dark triangle on the counter. Conversely, poorly aimed fixtures can create a doubled bright patch. The goal is an even working plane, not maximum brightness directly below each light.
Choose a fixture format that suits the finish quality you want
The fixture style affects both the appearance of the light and the complexity of installation.
| Fixture format | Useful for | Main planning concern |
|---|---|---|
| Linear bar or slim fixture | Clean, self-contained installations | Fixture depth and the visibility of individual fixture joins |
| LED tape in an aluminum channel with diffuser | Long continuous runs and custom lengths | Concealing the driver, channel, and all low-voltage connections |
| Puck lights | Display lighting inside cabinets or limited accent use | Pools of light and visible dots on the countertop |
| Plug-in light bars | Simple upgrades where a nearby receptacle is acceptable | Managing visible cords and limited control options |
For task lighting, continuous linear light is usually easier to make visually calm than a series of puck lights. Pucks create distinct circles of illumination, and their individual light points may reflect in polished stone, glossy tile, or stainless-steel surfaces.
If using LED tape, install it in a suitable channel and diffuser where the system calls for one. A diffuser can soften the appearance of individual diodes and help protect the tape from handling and kitchen debris. It does not correct poor placement, however; a bright exposed strip can still be visible from across the room.
Match color quality with the rest of the kitchen
Under-cabinet lighting is often used when preparing food, reading labels, and evaluating countertop and backsplash colors. Choose a color temperature that does not fight the room鈥檚 other lighting. A kitchen with warm decorative pendants can look disjointed if the counter lighting appears noticeably cooler.
Color rendering also matters, particularly for food, wood cabinetry, paint, and natural stone. Learn more about this in our guide to what CRI means in lighting. Before committing to a full installation, view a sample fixture at night alongside the room鈥檚 existing lights.
Plan power before the cabinets close off access
Power routing is often the part of an under cabinet lighting installation that is hardest to improve later. A finished kitchen may leave no easy route from a wall switch or electrical source to the cabinet undersides. This is why a lighting plan should be discussed before cabinet installation, backsplash work, or final wall finishing.
There are three broad approaches.
Hardwired under cabinet lighting
Hardwired under cabinet lighting is connected to the home鈥檚 electrical system rather than plugged into a countertop receptacle. It can provide the cleanest result because cords are not visible and the lights can be coordinated with wall controls, dimmers, or smart controls.
It also requires early planning. The electrician needs a route for supply wiring, appropriately located connection points, and access to any required junctions or equipment. Do not bury a driver, connection, or junction in a wall, cabinet cavity, or ceiling unless the equipment instructions and current local rules specifically allow that arrangement. Components that may need service should remain accessible.
Electrical work, circuit changes, and connections to building wiring should be handled by a qualified electrician. Requirements vary by location and project conditions, so confirm the current local rules before work begins. If the system requires a particular type of dimmer, driver, or control method, provide those specifications to the electrician before rough-in.
Low-voltage systems with a remote driver
Many tape-light systems use a remote driver that supplies the lighting at a lower voltage. The driver needs a planned home: often in an accessible cabinet, a utility area, or another serviceable location approved for the equipment and installation method.
Avoid choosing the driver location solely because it is hidden. A driver can eventually need inspection, replacement, or troubleshooting. It should be reachable without removing finished cabinet parts or damaging a backsplash.
Keep the driver-to-light runs within the manufacturer鈥檚 stated limits. Long or improvised runs can contribute to uneven output, especially if several sections are fed from one location. Use the system鈥檚 intended connectors, wire types, and accessories rather than mixing unrelated components.
Plug-in systems
Plug-in fixtures can be appropriate for a quick upgrade, a rental where permitted, or a kitchen that already has a practical concealed receptacle location. Their limitation is visual: cords need somewhere to go.
A cord draped down the backsplash or across the counter undermines both safety and appearance. If a plug-in approach is the right fit, plan a discreet cable path and avoid pinching cords behind cabinet parts. Do not alter a fixture cord or use an arrangement that conflicts with the manufacturer鈥檚 instructions.
Select controls before choosing the fixtures
Controls are not an afterthought. A good under-cabinet system should be easy to use when hands are wet, busy, or carrying food, and it should behave predictably with the kitchen鈥檚 other lights.
Common control approaches include:
- A dedicated wall switch for under-cabinet lights
- A wall dimmer compatible with the fixture or driver
- Control grouped with recessed or pendant lighting
- An on-fixture switch for simple installations
- A wireless or smart control system designed for the selected lighting equipment
A dedicated dimmer is often the most flexible choice because under-cabinet lighting serves two roles. At full output, it is task lighting. At a low setting, it can provide comfortable evening navigation light without turning on the room鈥檚 brighter ceiling fixtures.
Do not assume every LED fixture will dim properly with every dimmer. Confirm compatibility among the fixture, driver, dimmer, and any smart-control hardware before buying. Flicker, limited dimming range, delayed startup, and buzzing are often compatibility problems rather than proof that the fixture itself has failed.
If you are replacing an existing switch with a smart dimmer, wiring arrangements can affect what is possible. Our explanation of why light switches may need a neutral wire provides useful background, but an electrician should assess the actual switch box and local requirements.
A practical installation sequence
For a kitchen renovation, use this order to prevent expensive rework:
- Map cabinet runs and work zones. Mark where task light is needed and note interruptions such as a hood, window, or open shelf.
- Choose the fixture system early. Obtain the fixture, driver, connector, and control specifications before electrical rough-in.
- Confirm mounting positions on cabinet drawings. Make sure the front rail will hide the fixture without blocking its useful light.
- Plan accessible power and driver locations. Coordinate this with the cabinet installer and electrician before cabinets or backsplashes close off access.
- Decide how the lights will be switched and dimmed. Confirm control compatibility before installation.
- Test a sample section. Check output, reflections, and color appearance on the actual countertop and backsplash materials.
- Install, connect, and test the complete system. Follow the equipment instructions and have hardwired work completed and checked by a qualified professional.
- Aim for serviceability. Record the fixture and driver model information, control type, and location of accessible components for future maintenance.
Common mistakes that are difficult to correct later
Installing the lights after the backsplash
Retrofitting is possible, but a finished backsplash can limit where cables, junctions, and fixture mounts can go. It may also make a clean wire route much harder to achieve. Plan the system before finish surfaces are installed whenever possible.
Choosing fixtures before deciding where the driver goes
This is especially common with tape-light systems. The LEDs may fit perfectly under the cabinets, but the required driver and connections still need a safe, accessible location. Solve that question before ordering a long run of lighting.
Letting the cabinet rail dictate all placement
A deep rail can hide a fixture well but can also block too much light if the fixture is mounted too far back. A very shallow rail may leave the light source visible. Review the actual cabinet profile, not only a showroom photo or product rendering.
Using one control setting for every situation
Kitchen task lighting benefits from dimming. Brightness that is useful for chopping vegetables may be unpleasant late at night. Choose a control arrangement that lets the lighting function as both task and low-level ambient light.
Ignoring reflective surfaces
Polished stone, glossy tile, glass mosaic, and stainless appliances can reveal every diode, seam, and uneven patch of light. Test a sample in place before installing the entire run. If you are choosing paint or finishes around the same time, see our guide on testing paint color in kitchen lighting.
When to bring in an electrician
Use a qualified electrician when the project involves new wiring, a new circuit, hardwired fixtures, changes inside switch boxes, or uncertainty about existing wiring. Ask the electrician to review the planned driver locations, switching arrangement, equipment compatibility, and access for future servicing before cabinetry is finalized.
Also verify that fixtures and associated components are appropriately listed and marked for their intended use and location. UL and ETL are examples of independent safety certification marks commonly found on lighting equipment, but the specific product marking and installation instructions still need to match the project conditions. Local rules, cabinet construction, proximity to water, and the electrical system can all affect what is acceptable.
The best under-cabinet lighting installations are almost invisible in the daytime: concealed fixtures, no dangling cords, no unexplained bright spots. At night, they should put clear, even light exactly where the kitchen is used and respond naturally to the rest of the room鈥檚 lighting controls.
References
- UL Ratings | UL Listings for Lighting and Ceiling Fans at Lumens. (n.d.). https://the-edit.lumens.com/the-guides/ul-ratings
- Under-Cabinet Lighting Installation | Storm Electrical. (n.d.). https://www.stormelectricalusa.com/under-cabinet-lighting-installation
- Luminaires Marking and Application Guide .... (n.d.). https://code-authorities.ul.com/wp-content/uploads/2014/07/LuminairesMG_April2006_Final.pdf
- Pot Lighting & Under Cabinet Lighting Installation | Go Electrical Inc.. (n.d.). https://www.goelectricalinc.ca/electrical-services/pot-lights-under-cabinet-lighting-installation
- The Complete Guide to Under-Cabinet Lighting Installation | Above the Code Electrical. (n.d.). https://abovethecodeelectrical.com/under-cabinet-lighting-installation-guide
- Wiring Diagram For Under Cabinet Lighting: A Comprehensive Guide. (n.d.). https://easywiring.co/wiring-diagram-for-under-cabinet-lighting
- Electrician Under Cabinet Lighting | Kitchen Counter Lights. (n.d.). https://www.mrwattelectricity.com/our-services/under-cabinet-lighting-installation
- UL Listings: Dry vs. Damp vs. Wet Take Three Lighting. (n.d.). https://www.takethreelighting.com/ul-listing-comparison.html