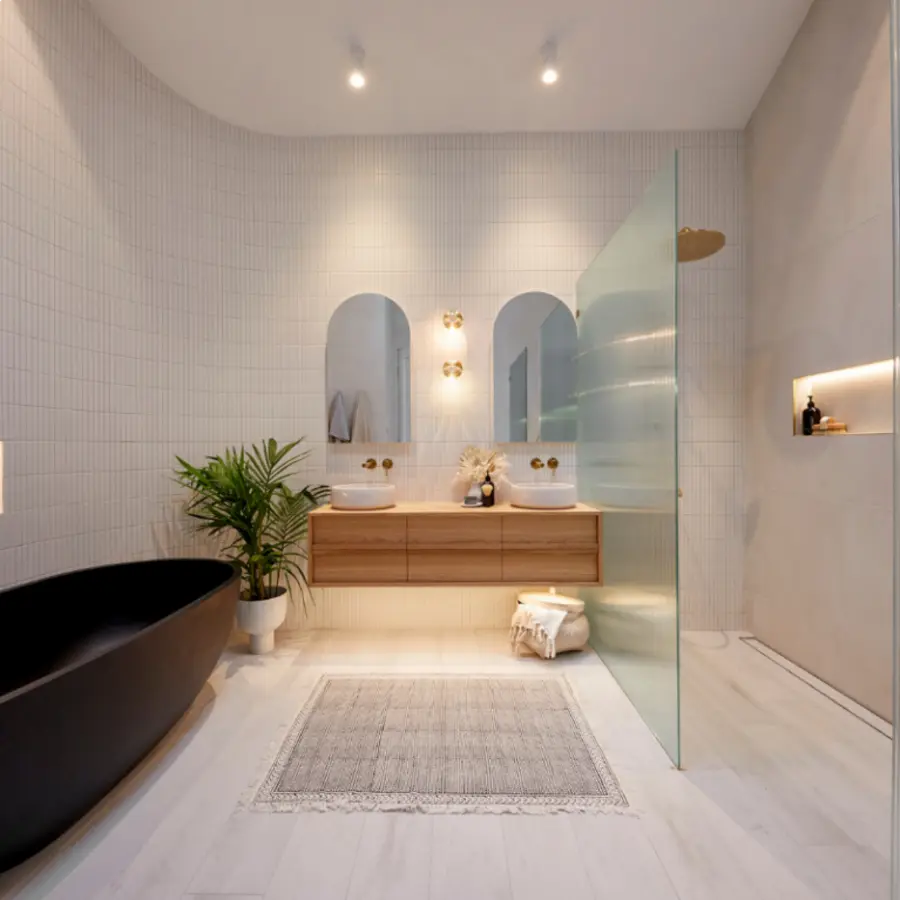
For most compact shower stalls and tub-shower combinations, one recessed light centered over the usable standing area is usually the simplest effective arrangement. It gives direct light where it is needed without putting a bright source too close to a wall or at the edge of the enclosure.
A second recessed light is most useful in a long walk-in shower, a shower with a bench or separate drying area, or an enclosure where one central downlight leaves one end noticeably dim. The goal is not simply to add brightness. Good recessed light placement in a shower puts light on the areas people use while reducing the strong contrast that makes walls, niches, and the lower part of the shower feel shadowed.
Start with the shower's usable zones
Plan around where someone stands, turns, rinses, and reaches for controls—not just the outline of the tiled enclosure. A shower may be rectangular on a floor plan but have several distinct lighting needs:
- The main standing and washing position
- The controls and showerhead area
- A bench, if present
- A niche or shelf that becomes dark under an overhead-only light
- The entry end of a long, open shower
A downlight sends most of its light downward. When it is directly above the bather, the body can block light from reaching nearby vertical surfaces. This is why a shower can seem adequately bright from outside but still feel shadowy while in use.
The practical response is usually to improve the layout across the shower area, rather than choosing an excessively bright single fixture.
The best placement for one recessed light
A single recessed light works well when the shower is compact and has one clear standing area. Place it near the center of that usable area, rather than automatically at the geometric center of the entire enclosure.
For example, if the showerhead and controls are located toward one end, centering the light over the actual standing position can be more useful than centering it over unused floor space near the door. In a tub-shower combination, the centered position over the bathing zone is generally the logical starting point.
Avoid pushing the fixture tightly toward a wall merely to brighten that wall. A downlight placed too close to tile can create a bright patch high on the wall and a more obvious falloff below it. It can also be uncomfortably glaring when viewed from beneath.
One light may not be enough when:
- The shower is long enough that its far end looks dim.
- A bench or drying area sits outside the main showerhead zone.
- Dark tile, deep niches, or a dark shower curtain absorb much of the available light.
- A glass enclosure makes uneven pools of light especially noticeable.
- The existing ceiling light creates a clear shadow around the bather's shoulders or on the controls.
When two recessed lights in a shower are justified
Two recessed lights in a shower are most effective when they serve two parts of the enclosure rather than duplicate the same pool of light. This often applies to larger walk-in showers, elongated rectangular showers, and layouts with both a showering area and a bench.
In a long rectangular shower, arrange the two fixtures along the long axis of the space. Give each fixture a role: one can cover the main standing area, while the other supports the entry, bench, or far end. This distributes light through the enclosure and reduces the visual drop-off that occurs when one fixture has to cover the full length.
Do not place both lights extremely close together over the showerhead. That creates a bright central hotspot but does little for the darker end of the shower. Likewise, do not automatically place them at the very edges. Edge placement can make the walls visually harsh and can leave the center less balanced.
A useful planning method is to divide the usable shower length into two zones, then center one fixture over each zone. Review the resulting layout against the locations of the showerhead, bench, door, and niche. Small adjustments may be appropriate when one of those features needs more usable light.
Two-light layouts that tend to work
| Shower condition | Starting layout idea | Why it helps |
|---|---|---|
| Compact shower with one standing area | One fixture centered over the standing area | Keeps the plan simple and focused |
| Long rectangular walk-in shower | Two fixtures spaced along the long dimension | Covers both ends without relying on one intense center light |
| Shower with a bench | One light for the standing area and one for the bench or adjacent open zone | Prevents the bench from becoming a dark corner |
| Open shower with glass panel | Two lights distributed across the enclosure | Helps the lighting appear more even through the glass |
| Shower with a deep niche | General shower light plus a carefully planned second light if the enclosure is large | Reduces overall contrast; the niche may still need its own dedicated solution |
Reduce shadows without creating glare
More recessed lights are not automatically better. A shower ceiling is close to the user, especially in bathrooms with standard-height ceilings. Bright, exposed-looking light sources can feel harsh when someone looks upward while rinsing their hair.
Choose a recessed fixture and trim that manage glare well. A deeper-set light source, a baffled trim, or an optic designed to soften the apparent brightness can be more comfortable than a flat, highly visible bright disk. The appearance and beam spread of the specific fixture matter as much as the number of openings in the ceiling.
A wider distribution can help one fixture cover a compact shower more evenly. In a larger shower, two moderate-output fixtures often create a calmer result than one very bright downlight. If possible, put shower lighting on a dimmer so the room can be brighter for cleaning and softer for a late-night shower. Confirm that the fixture, driver, dimmer, and installation method are compatible before specifying that control.
Light-colored tile reflects some light back into the enclosure, while matte charcoal tile, textured stone, and dark grout tend to reveal uneven illumination more readily. In a dark shower, address layout first before assuming that a much brighter fixture is the only answer.
Treat niches and vanity lighting as separate problems
A ceiling downlight may improve visibility in a niche, but it rarely lights the contents evenly. The shelf itself blocks light, and the niche's top surface can cast a shadow over bottles and soap. If a niche must be easy to use and visually prominent, it may need a separately planned low-voltage lighting detail designed for that wet environment.
The same principle applies outside the shower. Recessed lighting is useful for general bathroom light, but it does not replace good face lighting at the vanity. For help coordinating zones across the room, see our guide to <a href="/guides/recessed-lighting-layout/">recessed lighting layout</a>.
Wet-location and installation checks
A shower is not an ordinary ceiling location. The fixture, trim, lens, junction box arrangement, and installation details need to be suitable for the moisture and water exposure expected at that exact location.
Do not assume a recessed light is suitable because it is labeled for bathrooms, has a sealed appearance, or is described as damp-rated. Verify the manufacturer's marking and installation instructions for use in a wet location where the fixture will be installed. Requirements can differ by fixture construction, enclosure type, ceiling condition, and local rules.
Also verify current requirements with a qualified electrician or local building authority before cutting the ceiling. This is especially important when the ceiling assembly has fire-resistance requirements, insulation contact considerations, a steam-shower condition, or limited space above the ceiling. An electrician can also confirm whether the switching and dimming plan is appropriate for the selected equipment.
For a broader explanation of rating terminology, read <a href="/guides/ip-ratings-for-lights/">how IP ratings for lights work</a>.
Common shower recessed-light placement mistakes
Centering on the enclosure instead of the person
A geometrically centered light can be misplaced if the showerhead, controls, or normal standing position are noticeably offset. Start with use, then check visual balance.
Adding a second light without assigning it a purpose
If two lights both land over the same standing position, the result may be brighter but not meaningfully less shadowy. Use the second fixture to cover the far end, bench, or another active zone.
Placing fixtures too close to tile walls
A wall-adjacent downlight can emphasize the upper wall, create glare, and make the layout look accidental. Keep the fixture within the usable lighting field rather than treating it as wall-wash lighting.
Using general room spacing rules without adapting them
Whole-room recessed-light spacing rules are only a starting point. A shower is a small enclosed zone with reflective surfaces, steam, glass, and a person directly below the light. Plan the shower separately from the rest of the bathroom.
Ignoring the fixture's wet-location suitability
A recessed opening in the shower ceiling must be treated as a moisture-exposed installation. Confirm the current applicable requirements and the fixture's listed use before installation.
A practical decision rule
Choose one centered wet-location-suitable recessed fixture when the shower is compact, has one primary standing area, and does not have a dark bench or distant end.
Choose two recessed fixtures when the shower has enough length or distinct activity zones that one fixture would leave a meaningful portion of the enclosure dim. Space them along the long direction of the shower and center each over a useful zone, rather than clustering both over the showerhead.
If shadows remain a concern after the layout is planned, review the fixture's beam distribution, glare control, dimming compatibility, and the reflectance of the tile. Placement can solve much of the problem, but the trim and optical design determine how comfortably that light is delivered.
References
- Bathroom Recessed Lighting Placement Tips. (n.d.). https://www.riverbendhome.com/blogs/advice-ideas/bathroom-recessed-lighting-placement-guide
- Bathroom Recessed Lighting: Layout & Placement Guide | Skonne. (n.d.). https://skonne.com/blogs/journal/bathroom-recessed-lighting-guide
- Bathroom Recessed Lighting Placement Tips. (n.d.). https://lusalighting.com/blogs/blog/recessed-lighting-in-bathroom-placement
- Bathroom Recessed Lighting Placement | Layout That Works. (n.d.). https://wellwhisk.com/bathroom-recessed-lighting-placement
- Recessed Lighting Spacing Guide | PROLIGHTING. (n.d.). https://www.prolighting.com/blog/2026/07/28/recessed-lighting-spacing-guide
- Recessed Lighting in Bathrooms: Placement, Wet Rating & Code Tips – Amicolight. (n.d.). https://amicolight.com/blogs/news/recessed-lighting-in-bathrooms-placement-wet-rating-code-tips
- lighting "approved for use in showers". (n.d.). https://forums.mikeholt.com/threads/lighting-approved-for-use-in-showers.2569953
- Bathroom Recessed Lighting Layout: How to Plan Placement and Spacing. (n.d.). https://kitchprep.com/bathroom-recessed-lighting-layout-how-to-plan-placement-and-spacing