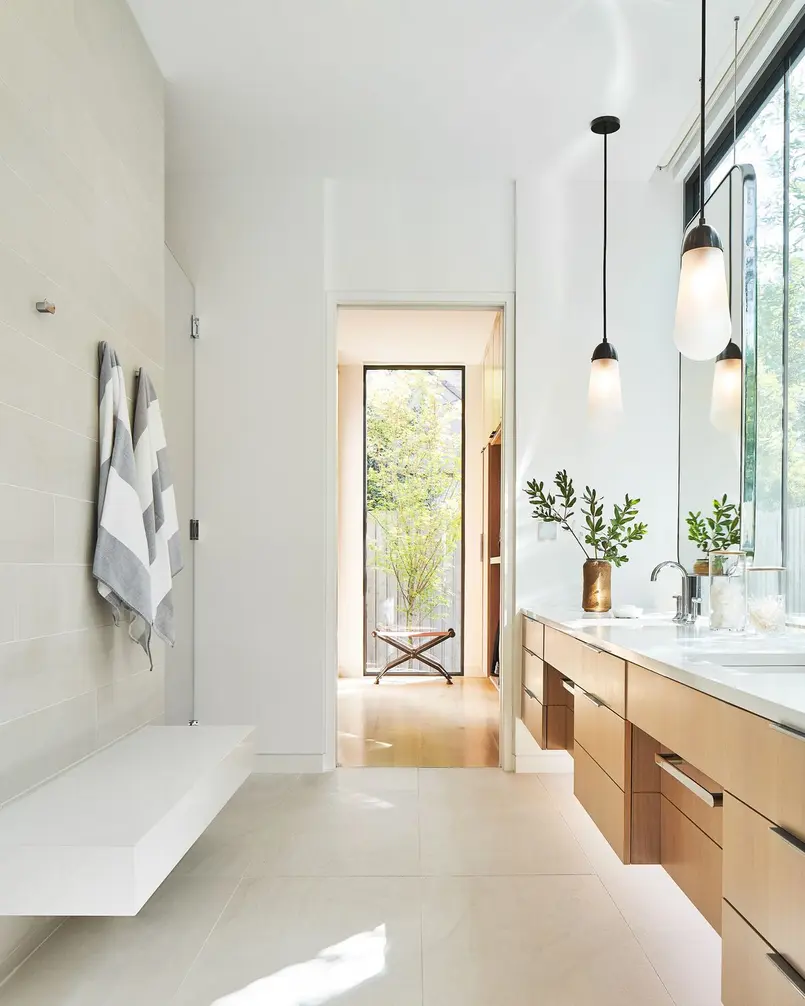
Accessible bathroom lighting should make the route from door to toilet, vanity, and shower easy to read without harsh glare or deep shadows. For a person using a walker, managing reduced balance, or showering from a seat, the most useful plan combines broad, even general light; clear mirror light; dedicated shower light; and low-level guidance for nighttime trips.
Lighting cannot compensate for a slippery floor, a poorly placed grab bar, inadequate clearance, or an inaccessible shower control. Treat it as one part of an aging-in-place bathroom plan, coordinated with the layout, flooring, hardware, and electrical work from the beginning.
Start with the movement route, not the fixture list
Before choosing fixtures, stand at the bathroom entrance and map the likely path through the room. Consider where a walker may pause or turn, where a caregiver may stand, where towels and toiletries are reached, and where a person transfers to a shower seat.
The lighting goal is continuity. A bright vanity paired with a dim toilet area can leave a person stepping into shadow. A single ceiling fixture may illuminate the middle of the room while leaving the floor beside the shower curtain, toilet, or door poorly defined.
Look particularly for these areas:
- The threshold and the space immediately inside the door
- The route between the door, toilet, vanity, and shower
- The floor beside a shower seat or shower entry
- The wall holding shower controls and grab bars
- The vanity, including the face and hands rather than only the countertop
- Storage locations for medication, towels, and daily-care items
A useful rule is to light surfaces and decisions, not simply the room's center.
Build the room in layers
1. Use even ambient light for the whole bathroom
General lighting should reveal the entire floor plane with as few abrupt dark patches as possible. Ceiling-mounted fixtures, recessed lights, or a well-positioned surface fixture can all work, depending on ceiling construction and room size.
Placement matters more than the fixture category. Avoid concentrating all overhead light directly behind the user at the vanity, where their own body can cast a shadow over the sink and face. In a narrow bathroom, a sequence of carefully spaced ceiling lights may provide a more even result than one powerful center fixture.
Choose a diffuser or fixture design that softens the visible light source where possible. Bare lamps, exposed bright LED points, and highly mirrored trim can be uncomfortable for people with glare sensitivity or age-related changes in vision.
Light-colored matte ceilings and walls help distribute light gently. Very dark finishes, glossy tile, and polished stone can create stronger contrast and reflections, so they may need more careful fixture placement.
2. Light the mirror from the front and sides
For bathroom lighting for elderly people, the vanity is often the place where glare causes the most frustration. A downlight above and behind the user can make the mirror bright while leaving shadows beneath the eyes, nose, and chin.
The preferred approach is soft, forward-facing light from both sides of the mirror, or a broad, diffuse fitting that sends light toward the face from near the mirror plane. This makes grooming, shaving, skin care, and medication-related tasks easier to see without relying on a harsh overhead beam.
Aim for these qualities rather than a specific fixture style:
- A broad illuminated surface instead of visible pinpoints
- Light on both sides of the face when practical
- A fixture position that does not block the view of the mirror
- Reduced reflected glare from glossy tile or a highly polished countertop
- Good color rendering so skin tone, labels, spills, and bruising are easier to distinguish
Color rendering is especially relevant in a bathroom, where a person may need to judge skin color or read small packaging. For more context on this specification, see our guide to what CRI means in lighting.
3. Give the shower its own clear light
A shower seat changes where tasks happen. The user may be seated lower than a standing person, looking toward the controls, niches, shelf, showerhead, and floor near their feet. Light from outside the enclosure is often blocked by a curtain, a frosted screen, or the user's own body.
A dedicated shower light can make that zone clearer, provided it is selected and located appropriately for the wet area. A diffused ceiling fixture generally creates a calmer result than a small, intense spotlight aimed directly at the seat.
Avoid placing a bright source where it reflects sharply from wet tile, glass, chrome fittings, or water. Also avoid putting the only shower light directly behind the seated person's head, which can make the controls and their hands harder to see.
Bathroom zones, fixture suitability, and electrical protection requirements vary by location and local rules. Ask a qualified electrician to confirm the appropriate fixture rating, installation method, and circuit protection for the exact shower area. Our overview of IP ratings for lights can help explain the marking on a fixture, but it does not replace local electrical guidance.
4. Add low-level light for night use
Bathroom night lighting should support orientation without delivering a sudden burst of bright light to dark-adapted eyes. The ideal route is visible before a person takes the first step, especially when they use a walker or need time to regain balance after waking.
Low-level lighting can come from a small wall light, an illuminated toe-kick below a vanity, concealed light near the floor, or a carefully shielded plug-in light where suitable. The source should be indirect or screened so it marks the route rather than shining into the eyes.
Keep the night path simple:
- Provide a visible route from bedroom or hall to the bathroom entrance.
- Continue the guidance light from the door toward the toilet.
- Avoid isolated bright points that produce glare on a wet floor.
- Use a warm, subdued appearance if it helps preserve nighttime comfort.
- Make sure any automatic control does not switch off while the room is still occupied.
Motion or occupancy sensors can be useful when a person may not reach a switch easily. Test the detection area from a seated position and at walker height, however. A sensor that sees only someone standing in the room can leave a seated shower user or a still person at the vanity in darkness.
Choose controls that are easy to find and use
A well-lit bathroom is less useful if the main control is hidden behind an open door or requires a difficult grip. Put the primary switch where it can be reached before entering a dark room, and consider a second control point if the bathroom has more than one practical approach.
Large paddle-style switches are often easier to operate than small toggles. Dimmers can be valuable because one person may want fuller light for grooming while another needs a softer level during a nighttime visit. If a dimmer is used, make sure its control is easy to identify by touch and compatible with the selected light source.
Illuminated switch locators can help find controls in the dark, but test them at night. A locator that is too bright can become its own source of glare.
Reach ranges and control requirements can differ between private homes and public or commercial projects. ADA Standards apply to specified public accommodations, commercial facilities, and government settings rather than automatically governing every residence. For a home renovation, discuss switch location, accessibility needs, and current local electrical rules with the electrician and, where appropriate, an accessibility specialist.
Make contrast useful, not dramatic
Lighting works alongside visual contrast. A toilet against a similarly colored wall, a clear glass shower screen, or a small chrome control on pale tile can be difficult to locate even in a bright room.
Use light to reveal edges, but do not create false visual steps. Strong stripes of shadow across a floor, extreme pools of light, and shiny finishes can make a flat surface look uneven. This may be unsettling for someone with reduced depth perception or balance concerns.
Matte finishes and reasonably consistent light levels usually make the room easier to interpret. If there is a threshold, change in floor material, shower edge, or grab bar, make sure it remains visually distinct under both daytime and nighttime lighting.
A practical accessible bathroom lighting plan
For many downstairs shower conversions, a straightforward arrangement is enough:
- Provide broad ceiling light that reaches the entry, toilet, vanity, and open floor area.
- Add diffuse light at the mirror that illuminates the face from the front or sides.
- Include dedicated, wet-area-suitable lighting for the shower and seat zone where needed.
- Install low-level guidance light for the nighttime route to the toilet.
- Place controls where they are reachable before entering the room and easy to operate.
- Test the room with the intended user, including with the walker, from a seated position, and during evening conditions.
The final test is practical: can the user see the floor, controls, toilet, towel, mirror, and shower seat without being dazzled? If not, improve distribution and shielding before simply adding a brighter lamp.
Common mistakes to avoid
Relying on one central ceiling fixture
A single fitting often leaves facial shadows at the mirror and dim zones around fixtures. Add task lighting where detailed activities occur.
Using bright exposed lamps as a substitute for coverage
More intensity can worsen glare while failing to improve the floor or face illumination. Diffusion and placement are usually more effective than an exposed high-output source.
Forgetting the view from a shower seat
Check the light with someone seated. Controls, shelf contents, and the floor may look very different from that height.
Treating night lighting as decorative only
A small decorative glow may not show the path, toilet, or obstacles. The night layer should support real navigation while remaining gentle on the eyes.
Selecting a shower fixture without confirming suitability
Wet-area fixture selection and installation involve safety rules that depend on the precise location and local requirements. Confirm the plan with a qualified electrician before work begins.
When to bring in professional help
Consult an electrician early if the conversion adds shower lighting, new switches, sensors, dimmers, or circuits. This is particularly important when walls are opened, existing wiring is uncertain, or the bathroom layout is changing.
An occupational therapist, aging-in-place specialist, or experienced accessible-bathroom designer can also help evaluate the room from the user's actual mobility level. Their input can connect lighting decisions to walker clearance, seated reach, transfer support, and future needs.
Accessible bathroom lighting is successful when it feels unremarkable: the room is easy to enter, surfaces are easy to read, the mirror is comfortable to use, and nighttime trips do not begin in darkness or glare.
References
- Is a shower meeting ADA requirements truly accessible?. (n.d.). https://www.facebook.com/groups/CoastalAdaptiveSports/posts/25134931689424198
- Handicap Walk In Showers: 10 Best Powerful Solutions 2025. (n.d.). https://satelliteindustries.com/blog/handicap-walk-in-showers-2
- ADA Guidelines for Small Handicap Bathroom Designs - American Specialties, Inc.. (n.d.). https://americanspecialties.com/ada-guidelines-for-small-handicap-bathroom-designs
- ADA Compliant Lighting: Meeting Accessibility Standards with Effective Design. (n.d.). https://faro.es/en/blog/ada-compliant-lighting-guide
- What Does ADA Compliant Lighting Mean?. (n.d.). https://remingtonlighting.com/blog/ada-compliant-lighting
- ADA Accessibility Standards. (n.d.). https://www.access-board.gov/ada
- ADA Requirements for Homes: Standards and Compliance. (n.d.). https://www.accessibilitychecker.org/blog/ada-requirements-for-homes
- ADA Standards for Accessible Design Title III Regulation 28 CFR Part 36 (1991) | ADA.gov. (n.d.). https://www.ada.gov/law-and-regs/design-standards/1991-design-standards


